
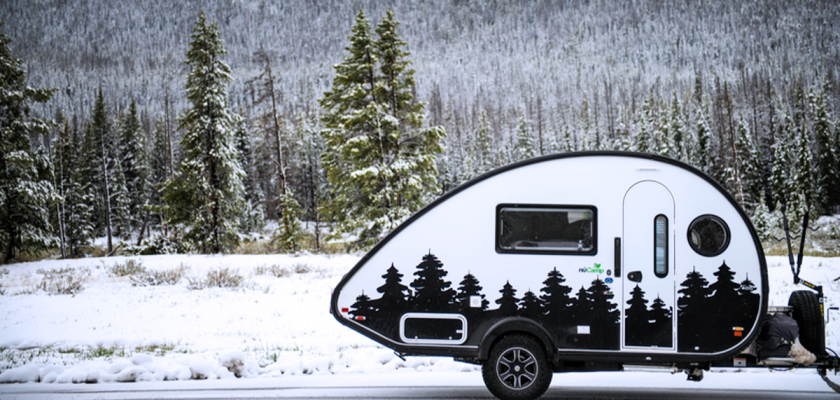
Cold weather can be unforgiving to an RV that isn’t properly prepared. I’ve learned through experience that taking the time to winterize your RV before the first frost can save you from costly repairs and unpleasant surprises once spring rolls around. Doing it right means protecting your pipes, water systems, and interior from freezing damage, corrosion, and mold. Whether you plan to store your RV or camp through winter, getting it ready is a step you can’t skip.
Start with a Thorough Clean-Up
Before diving into the technical steps, I always begin by cleaning my RV from top to bottom. It might sound simple, but leaving crumbs in the pantry or residue in the fridge can attract pests while your RV sits idle. I remove all food, empty the refrigerator, and wipe every surface down with a mild cleaner. I also vacuum the floors, clean the bathroom, and take out the trash.
For the exterior, I wash off any dirt or grime to prevent it from corroding the paint or leaving stains over time. A good wax helps protect the finish from winter moisture. Once everything is clean, I inspect the seals around windows, doors, and vents. Any cracks or gaps can let in moisture or cold air, so I reseal them before temperatures drop.
Drain and Flush the Water System
Water is the biggest threat to your RV during freezing weather. I’ve seen what frozen pipes can do, and it’s not pretty. The first step is to drain all the water from the system. I start by turning off the water heater and letting it cool down. Then, I open all faucets, including hot and cold sides, to allow air to flow through.
Next, I locate the low-point drains and open them to let the remaining water escape. Once everything is drained, I flush the system with compressed air or a water pump to remove any lingering moisture. Some RVers prefer to skip the air method and go straight to antifreeze, but I find combining both methods ensures no hidden water pockets remain.
Bypass the Water Heater
RV antifreeze isn’t meant for water heaters, so bypassing it is crucial. Most modern RVs have a built-in bypass valve, but if yours doesn’t, you can install one yourself. It saves you from using several extra gallons of antifreeze, which can be wasteful and expensive. After bypassing, I make sure the water heater drain plug is open and that the tank is completely empty.
Add RV Antifreeze to the Plumbing System
Using the right antifreeze is key. Only non-toxic RV or marine antifreeze should go into your plumbing system. I connect a hand pump or winterizing kit to the water inlet and pump antifreeze through the system. I start with the faucet furthest from the pump and work my way closer, opening each faucet until I see pink fluid flowing steadily.
Don’t forget to run the antifreeze through the toilet, shower, and any outdoor faucets. I also pour a bit into each drain to fill the P-traps, which prevents sewer gases from escaping. It’s a good idea to flush the toilet once after pouring antifreeze so that some of it enters the holding tank.
Protect the Holding Tanks
Speaking of tanks, I always add a little antifreeze directly into the black and gray tanks as well. This protects the valves and seals from freezing. Before doing this, I make sure both tanks are emptied and cleaned. Tank cleaning wands or flush systems make the job easier. After cleaning, I close the valves and pour about half a gallon of antifreeze into each tank.
Check the Batteries
Cold temperatures can drain RV batteries quickly. I remove mine entirely and store them in a cool but dry location, like a garage or basement. Before removing them, I disconnect the negative terminal first, then the positive. I check the fluid levels and top them off with distilled water if needed.
For those who prefer leaving batteries in place, I recommend using a battery maintainer or trickle charger to keep them in good condition. It prevents them from discharging completely during long periods of inactivity.
Prepare the Tires
RV tires can develop flat spots if left in one position for months. To prevent this, I park the RV on wooden planks instead of bare ground or concrete, which can sap moisture and accelerate cracking. If possible, I move the RV slightly every few weeks to distribute weight evenly.
I also inflate the tires to the manufacturer’s recommended pressure before storage. If the RV will be sitting for an extended time, tire covers are a great way to shield them from UV damage.
Seal and Ventilate the Interior
Moisture buildup inside an RV during winter can lead to mold and mildew. I make sure all vents, windows, and doors are properly sealed, but I still allow some airflow. Moisture-absorbing products like DampRid or silica gel can help maintain a dry environment.
For extra protection, I crack open a roof vent slightly and install a vent cover to keep snow or rain out while still allowing air to circulate. This prevents that stale, musty smell that can develop in a closed RV.
Take Care of the Propane System
If your RV runs on propane, it’s important to shut off the main valve and cover the tanks. I disconnect them completely if I’m storing the RV long-term. A propane leak, even a small one, can be dangerous. I also inspect hoses and fittings for any cracks or damage and replace them if needed.
For winter camping rather than storage, I test the propane appliances to make sure they’re running efficiently. Cold weather can affect pressure, so keeping tanks full helps maintain a steady flow.
Protect the Exterior
I use a breathable RV cover to protect the exterior from snow, ice, and UV rays. The key word here is “breathable.” Cheap plastic covers trap moisture underneath and can cause mold or paint damage. I also place covers on vents, the air conditioner, and any exposed parts like mirrors or hitches.
If your RV will be parked outside, avoid spots under trees. Falling branches or heavy snow can cause serious damage. I prefer to park on level ground with good drainage, so water doesn’t pool around the tires or undercarriage.
Care for the Engine and Generator
If you have a motorized RV, the engine and generator also need attention. I start by changing the oil and filter. Old oil can contain contaminants that corrode engine parts. Then I top off all fluids, including coolant, brake, and transmission fluid.
Running the generator for about 30 minutes with a load helps keep fuel stable and the carburetor clean. I also add a fuel stabilizer to prevent the gas from breaking down over time. For diesel engines, I fill the tank and add an anti-gel additive to prevent freezing.
Inspect and Lubricate Moving Parts
I like to check hinges, slides, and locks before winter hits. Cold temperatures can make metal parts stiff or corroded, so I lubricate them with silicone spray or lithium grease. Slide-outs benefit from a protective seal conditioner that keeps rubber gaskets soft and flexible.
Awning arms, jacks, and stabilizers also need a quick once-over. A light coat of lubricant ensures they’ll move smoothly once spring returns.
Store Your RV the Smart Way
Finding the right storage location can make a big difference. If indoor storage isn’t an option, I look for covered storage or at least an area that’s sheltered from harsh wind. Before locking up, I remove anything that might attract rodents, like paper towels or dry goods.
I also plug small openings, like those around plumbing or wiring, with steel wool to deter mice. Setting out a few traps or deterrents helps keep critters from making the RV their winter home.
Check on Your RV Occasionally
Even after winterizing, I like to check on my RV once a month. A quick inspection can catch problems early, like leaks, pests, or a dead battery. I make sure the cover is secure, remove any snow buildup, and look for signs of moisture inside. This small routine helps me avoid bigger surprises later.
De-Winterizing for Spring
When warmer weather returns, de-winterizing is just as important. I flush the antifreeze from the system, sanitize the water lines, and refill the tanks. I also recharge the batteries, inspect the tires, and check for any cracks in the seals. Starting the season with a well-prepared RV makes the first trip of the year stress-free and enjoyable.
Final Thoughts
Winterizing your RV the right way is about preparation and peace of mind. Taking the time to drain, clean, seal, and protect each part of your RV means fewer problems later and more time enjoying the open road. Over the years, I’ve learned that a few hours spent before winter sets in can save you from months of frustration and repairs. Whether you store your RV for the season or use it year-round, treating it with care ensures it’s ready to roll whenever adventure calls again.
That’s the beauty of RV life, it’s not just about where you go, but how well you take care of the journey along the way.